We recently had a problem with students running a host of different executable files on the computers managed by IT services. One of the favorite tools was one called Bosskey. This allowed students to have several virtual desktops and allow them to switch using a sinple keystroke. Think of it like Alt+Tab, but the window doesn’t appear in the taskbar.
As well as this, students would be playing games that they has stored in their folders and on flash drives. It is easy to remove games from students folders, but practically impossible to remove games from the students flash drives. Not really sure where to start with this, I had a look around for group policies that might be able to help me out. And what would you know, Microsoft had delivered.
Before I do into too much detail, Ill explain about the background of your setup. Each student has a unique user name and password to log into the domain environment. Their desktop and My Documents folders are redirected to a UNC path \files\student\yearX\username\documents and \files\student\yearX\username\desktop. This is the only remote place that they have read and write access to as well as a directory, c:\temp. As well as this, whenever a student logs into the computer it generates a folder in documents and settings, c:\Documents and Settings\username. Although they are using a manditory profile, Windows XP will generate a local profile once they log in. This is another place where the students can now read and write to. To summarise this, listed below are the only places where students can read and write.
- \files\student\yearX\username
- C:\temp
- C:\Documents and Settings
- Any USB drive that is plugged into the computer
Once we have identified where the students can write to, we can open the Group Policy Managments console and create a new policy. You can make this domain wide so that is applies to everyone or select individual organisational units of either user or computer accounts. This policy can be applied to either users or computers, so you can take your pick. I will be describing this on a per-computer basis, located in the root of the OU where all the computer accounts are located.
Create a group policy object called “Software restriction” and edit it.
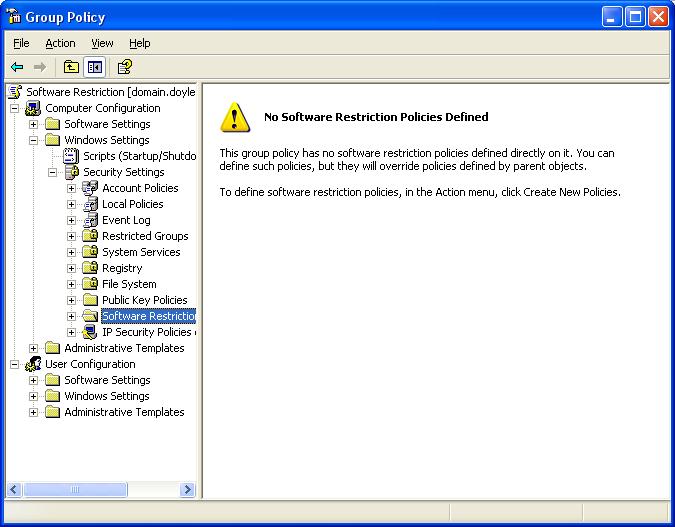
Right click on Software Restriction and click Create new policies.
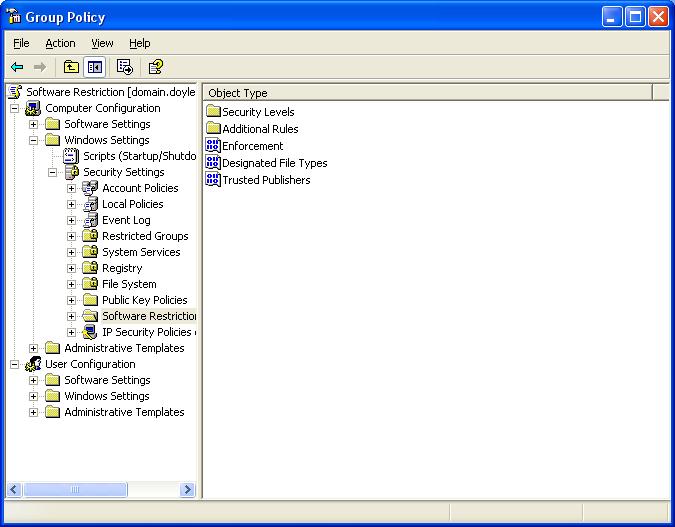
The set of file types that Windows defaults to is quite restrictive. It includes .lnk’s (Shortcuts) and some Access and VB components. We want to remove these file types from being restricted, so open Designated File Types.
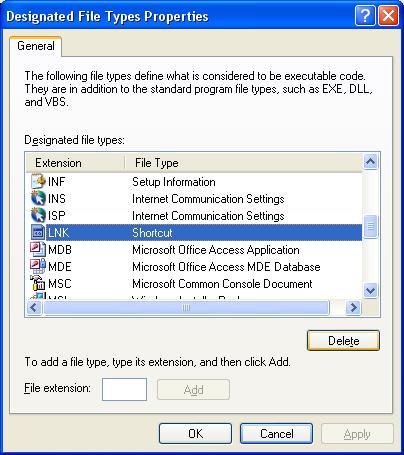
Remove any types that you don’t want included and then click OK. As mentioned earlier, you will want to remove LNK file types and a few others as well. You could remove everything except EXE files, but to be safe we will leave most file types there.
We have now set what file types we want restricted, now we need to specify the rules on how we enforce this. Before we do this though, we want to make sure that these retrictions are not placed upon administrators of the computers. Open up Enforcement.
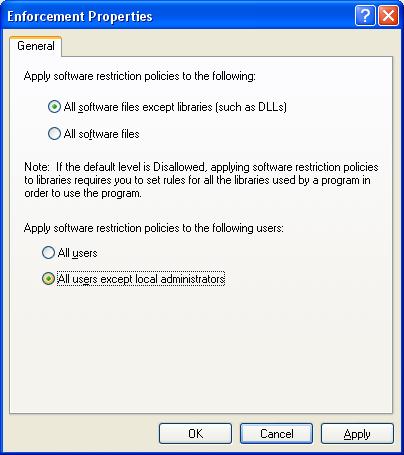
Change Apply software restriction policies to the following users: from All users to All users except local administrators. Click OK to return to the previous window. Now open the folder called Additional Rules.
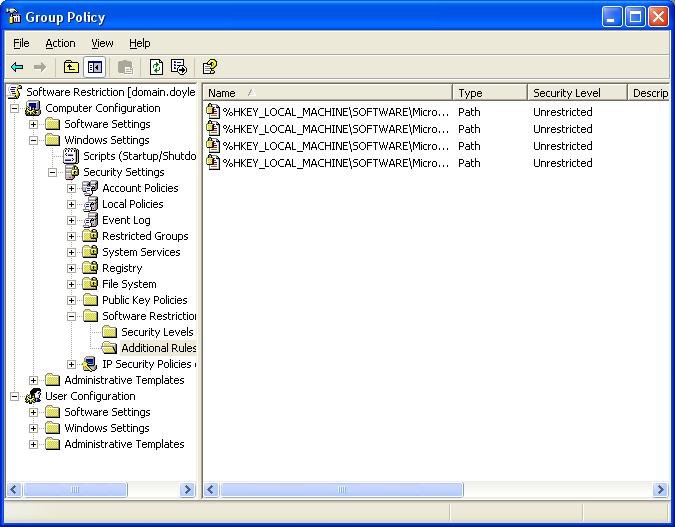
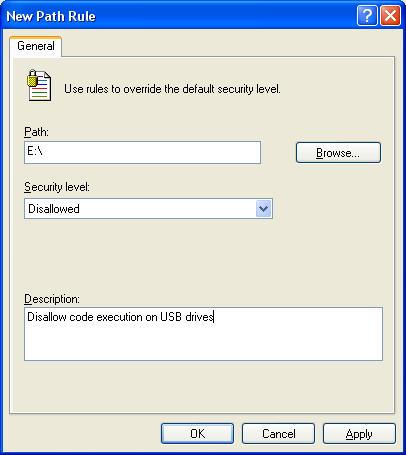
Notice how there are already a few rules contained in here. These allow execution of EXE’s in the windows paths. It is important to leave these, otherwise you could potentially lock all your users out from being able to use computers all together. Right click in the window and choose New Path Rule. Now we can add in the paths we defined earlier. First we can do the USB drives. These can take letters E: through to as many drives that you have. We will define E:, F:, G:, and H:
Repeat this process for the remaining drive letters. Now we can do the UNC paths.
Seeing as we don’t want to restrict all of \files\student, we will list all the sub folders. There are other folders in \files\student\ where we want to allow running programs. Finish off by adding C:\temp and C:\Documents and Settings\ to the disallowed list. Once this is done, close of the policy and do a gpupdate /force on the workstations at the command prompt to update these policies, or just wait the few hours for them to be pushed to your workstations.